Create a Minimal ASP.NET Membership Website (that will come in useful in another post)
This post contains no special considerations or insights, and is just meant to provide a base for the post here. If you are familiar with ASP.NET membership, DON’T READ THIS and go straight here. This is just a walkthrough which helps you to create a certain ASP.NET website which takes advantage of the membership provider authentication mechanism and that I use as a starting example in another post. We have excellent walkthroughs in MSDN on this topic (see this) however 1) this is a specific example and 2) if you are not familiar with our platform, here I added a lot of screenshots that may make your life easier.
Let’s say that we want to create a club website, where all the members are software architects who happen to have long hair (or an interest in growing them). We will use a sql membership provider store, we will create users, assign roles and use role info for granting or denying access to parts of the website.
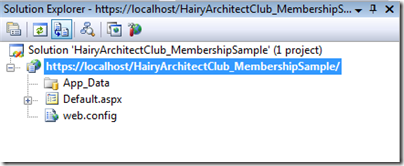
The first step is creating the website:

The result is a classic one-page website, with no special security settings.
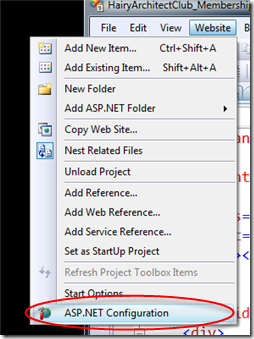
Let’s go to the Website menu and choose ASP.NET Configuration:
We’ll end up on the site admin tool, which will allow us to add & configure our membership store
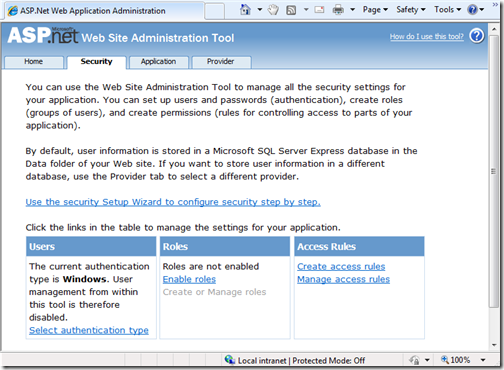
Let’s choose “use the security setup wizard..”
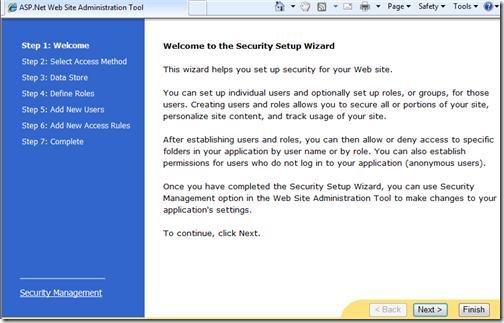
Standard splash screen: let’s move on
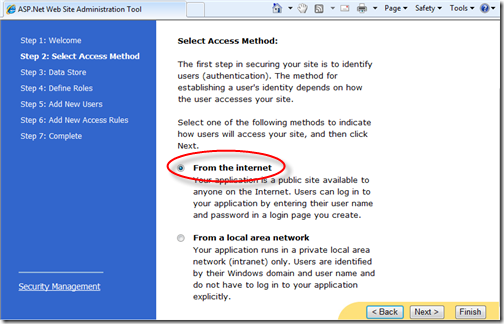
Our users will be from the public internet, let’s pick the right selection and move on
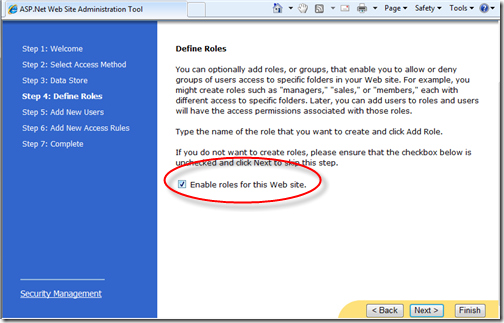
We do want roles.
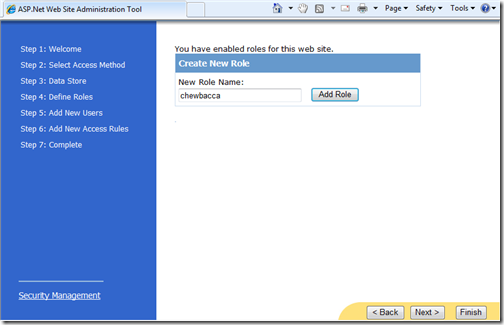
Let’s add some roles which represent different hair lengths
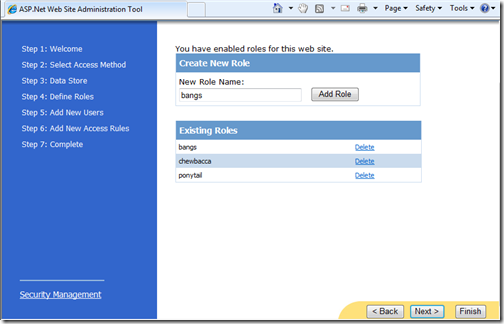
OK, you had enough fun already! four are more than enough 🙂
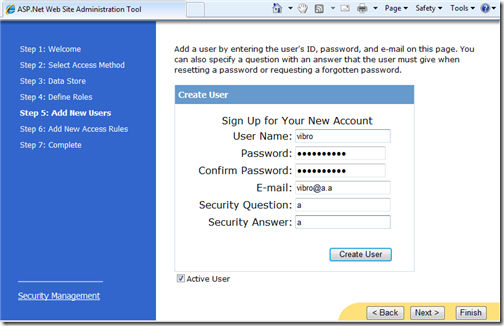
Let’s add some users: at least two, so that we can experiment with different role assignments
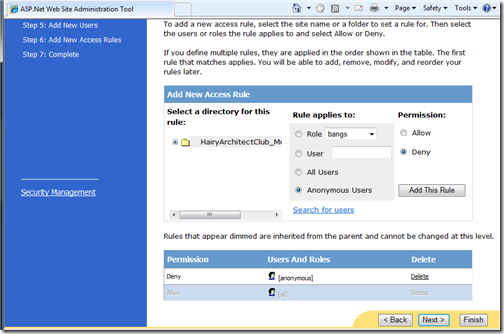
Let’s deny be default, and we’re almost done.
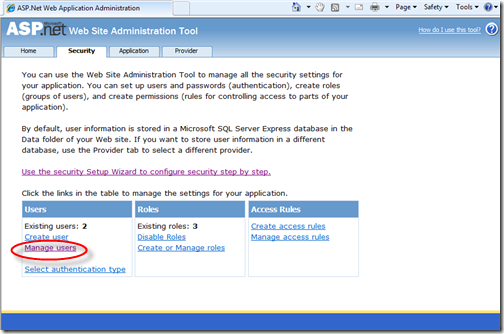
Now that we defined both users and roles, we need to assign the latter to the formers:

The UI makes it very easy

Once we assigned few roles, we can go back to the app.
Let’s customize the default page a bit: green background, some text, and a LoginStatus control that we can use for controlling the session (ie sign out if we are signed in & viceversa)

If we want to be even more adaptive, we can add a LoginName control in the text for personalized greetings

Now hat we have a users store, we need a page for gathering credentials and interrogate it. Let’s add a login.aspx page:

Let’s drag a Login control in there: that should do.

Now that we have our default and login pages, let’s add an extra page to demonstrate how to restrict content only to specific roles:

Write some nonsense in it, make it very recognizable (ie different background than the rest of the website, for example) and we’re done.

Let’s add a link to the restricted page from the home page:

Restricting the access to the page is easy: you just add the code fragment below in the web.config. That code means that only the members belonging to the role chewbacca can access the page.

Let’s give the website a spin. If you navigate to the default.aspx page, since you are not authenticated you’ll end up being redirected to the login page

Note in fact the address

Once we enter the right credentials, we are in.

If the user does not belong to the chewbacca role, he’ll be bounced back when trying to follow the exclusive content link. Let’s logout and sign in with a user that is in the chewbacca role:


This time we can successfully access the restricted page.
That’s it. As promised, nothing esoteric: no prescriptive guidance or best practices, just a little walkthrough for a trivial sample. I just needed a normal membership provider ASP.NET site as a starting point for the next post but 1) i didn’t want to spoil the signal/noise ratio of that post by adding instructions that are not useful for many readers while at the same time 2) i didn’t want to leave out the readers who are not too familiar with the membership.
On to the next post, where you’ll find the real substance 🙂

One Comment