Adding a Custom OpenID Provider to ACS… with JUST ONE LINE of PowerShell Code
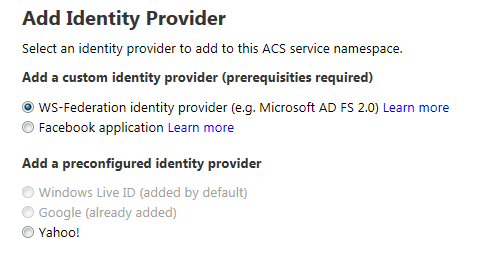
ACS offers you a variety of identity provider you can integrate with. Many of you will be familiar with the list shown by the management portal at the beginning of the add new identity provider wizard.
Some of you may also know that ACS integrates with Yahoo! and Google using OpenID, however from your point of view that doesn’t matter much: the details are abstracted away by ACS.
A less-known factlet is that ACS also supports integration with other OpenId providers: however that capability is not exposed via portal, you can only set it up via management APIs. We do have a tutorial which shows you how to do that step by step using myOpenID, you can find it here.
It’s not hard, that’s just OData after all, but it is still 6 printed pages. Now, how would you feel if I’d tell you that if you use the ACS cmdlets you can do exactly the same in ONE line of PowerShell code? Mind == blown, right? ![]()
Here we go:
PS C:UsersvittorioDesktop> Add-IdentityProvider –Namespace “myacsnamespace” –ManagementKey “XXXXXXXX” -Type "Manual" -Name "myOpenID" -Protocol OpenId –SignInAddress “http://www.myopenid.com/server”
That’s it! With the –Manual switch I can explicitly create any IP type. In order to maintain my boast that one line of code is enough, I used the inlined syntax for passing the namespace and the management key directly. In the announcement post I first obtained a management token with Get-AcsManagementToken, assigned it to a variable and passed it along for all subsequent commands, which is more appropriate for longer scripts (hence from now on I’ll use it instead).
That did the equivalent of the tutorial: however, that’ not enough to use myOpenID with the application yet. We still need to create rules that will add some claims or ACS won’t even send a token back. Luckily, that’s just another line of PowerShell code:
PS C:UsersvittorioDesktop> Add-Rule -MgmtToken $mgmtToken -GroupName "Default Rule Group for myRP" -IdentityProviderName "myOpenID"
Here I didn’t specify any input or output claim, which substantially ends up in a pass-through rule. NOW we’re ready! Let’s see what happens if I hit F5 on a plain vanilla Windows Azure webrole project where I added the SecurityTokenDisplayControl (you can find the VS2010 version in the identity training kit labs about ACS).
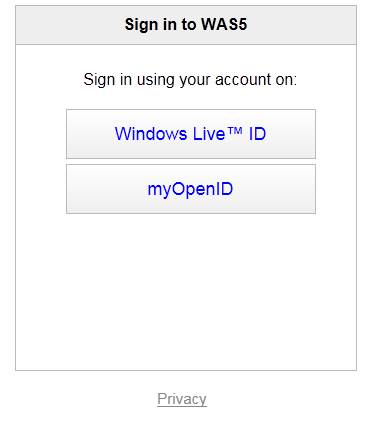
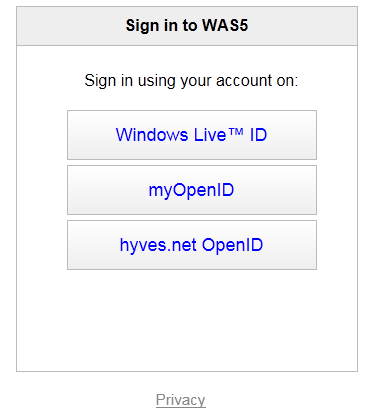
Oh hello myOpenID option! I’s there, good sign. Let’s hit it.
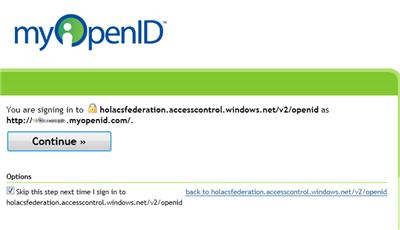
As expected, we end up on the auth page of openID. Once successfully authenticated, we get to the consent page:
Note that the consent does not mention any attributes, this fact will become relevant in a moment. Let’s click continue and…
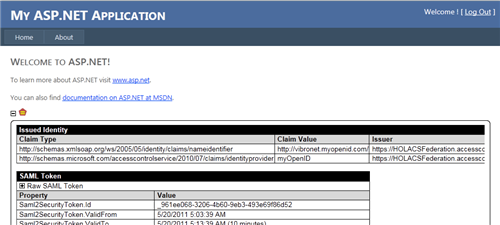
congratulations! You just added an arbitrary OpenID provider, and all it took was just 2 lines of PowerShell (without even touching your application or opening the ACS management portal).
Now, you may notice one thing about this transaction: we got an awfully low amount of information about the user, just the OpenID handle in fact. I am not very deep in OpenID, I’ll readily admit. Luckily Oren, Chao and Andrew from the ACS team came to the rescue (thank you guys) and explained that ACS gets claims in OpenID via Attribute Exchange, which myOpenID does not support (they use Simple Registration).
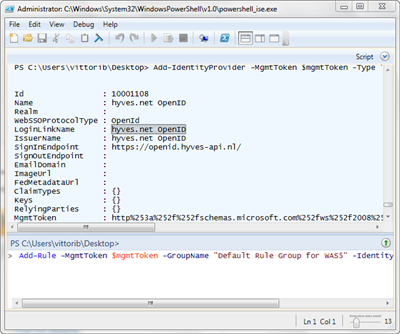
Bummer! I really wanted to show passing name and email. Luckily adding another OpenID provider which supports AX is just a matter of hitting the up arrow a couple of times in the PowerShell ISE and change the name and signin address accordingly. In the end I settled with http://hyves.net, since I was just recently in the Netherlands ![]()
Add-IdentityProvider -MgmtToken $mgmtToken -Type "Manual" -Name "hyves.net OpenID" -Protocol OpenId -SignInAddress https://openid.hyves-api.nl/
Add-Rule -MgmtToken $mgmtToken -GroupName "Default Rule Group for myRP" -IdentityProviderName "hyves.net OpenID"
Another F5…
…and the new option for hyves.net shows up. Good! Let’s hit it.
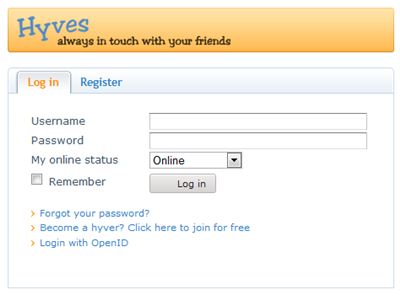
We get to their auth page. Let’s log in, we’ll get to the consent page.
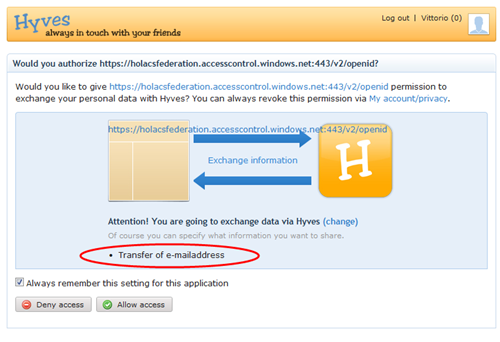
Now this looks more promising. Hyves.net asks permission to share the email address with the ACS endpoint, as expected. Let’s grant it and see what happens.
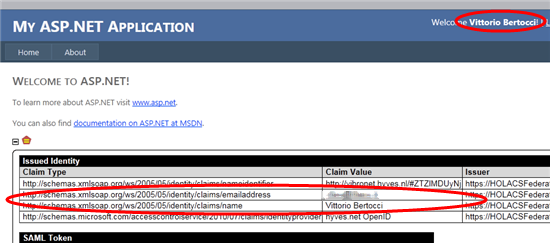
Bingo! This time ACS (hence the RP) got the name and email claims, just like I wanted.
Soo, let me recap. I just enabled users from two arbitrary OpenID providers to authenticate with my application; and all it took was writing two commands in the window below to provision the first provider, then modifying those two commands for provisioning the second. We are talking minutes here, and just because I am not a very good typist nor an expert in PowerShell.
I know it’s bad form that I am the one saying it: but isn’t this really awesome? ![]() Come on, do something with the cmdlets too! I am super-curious to see what you guys will be able to accomplish
Come on, do something with the cmdlets too! I am super-curious to see what you guys will be able to accomplish ![]()


Nice blog. Thanks for posting this