Using ADAL 3.x with Xamarin.Forms
You might have noticed that I am not blogging much lately – that’s because I am heads down trying to wrap this bad guy. However today I have to take a brief break from book writing and spend some time unblocking you guys on a super hot scenario, the use of Xamarin.Forms in ADAL.
I have been receiving TONS for requests for it lately, and the dirty secret is that the current ADAL 3.x already supports Xamarin.Forms – we simply did not have the time to publish a sample yet!
In this post I am going to share with you the absolute minimum code required to illustrate the approach. An official, full fledged sample will follow _ here I just want to unblock you.
ADALv3 and Xamarin.Forms
As you know from this post about our first ADAL 3.x preview, ADAL v3 supports multiple platforms via dependency injection: when you call AcquireToken you are requested to pass a pointer to the control hosting your UX, and that is enough for ADAL to infer which platform-specific assembly to load for hosting the auth UX, choose a storage tech for token caching, and so on. If you want a primer about that, check out this //Build session.
The approach does not work as-is with Xamarin.Forms, given that you define your UX in a platform-agnostic project – hence you don’t yet have a reference to your platform specific UX elements. However there are various ways to solve the issue: you just need to make that binding as soon as the app lifecycle allows. The approach we like and recommend goes as follows:
- In the pages from which you want to perform token acquisition operations, you expose a property of type IPlatformParameters and you use it in AcquireTokenAsync flows in lieu of the concrete implementation of it
- In the platform specific projects, you provide a PageRenderer for each of such pages. In that PageRenderer you take care of populating the aforementioned property with a the platform specific concrete implementation of IPlatformParameter
Pretty simple, right? Once again, you have to thank Afshin, Kanishk and James Montemagno for this neat trick ![]()
A super simple sample
Here there’s a trivial sample demonstrating the approach. It is *really* quick & dirty, please make sure you refer to it only for learning the PageRenderer/IPlatformParameter pattern and discard everything else ![]() .
.
Assuming that you have Xamarin installed on your system and your licensing level allows the use of Xamarin.Forms.
- Open VS and create a new project. Select Mobile Projects and pick Xamarin.Forms Portable.
- Add a NuGet reference to ADAL 3.x (from the prerelease feed) to both the Portable project and the iOS one
- I will leave Android as an exercise to the reader, and Windows Phone 8 is not supported by ADAL hence you can discard the corresponding project.
Let’s first work on the Portable project. Open App.cs and modify it so that it looks as follows (module your namespace, of course):
using Xamarin.Forms;
namespace X.FormsADALvs2013
{
    public class App : Application
    {
        public App()
        {
            MainPage = new MyPage();
        }
    }
}
That done, add a Content page to the project and name it MyPage.
Here there’s the complete source. Don’t be intimidated by it, as soon as you know how to read it you’ll find it trivial.
1: using Microsoft.IdentityModel.Clients.ActiveDirectory;
2: using System;
3: using Xamarin.Forms;
4:
5: namespace X.FormsADALvs2013
6: {
7: public class MyPage : ContentPage
8: {
9: public IPlatformParameters platformParameters { get; set; }
10: private Label results;
11:
12: async void getTokenButton_Clicked(object sender, EventArgs e)
13: {
14: AuthenticationContext ac =
15: new AuthenticationContext("https://login.microsoftonline.com/common");
16: AuthenticationResult ar = await ac.AcquireTokenAsync(
17: "https://graph.windows.net",
18: "e11a0451-ac9d-4c89-afd8-d2fa3322ef68",
19: new Uri("http://li"),
20: platformParameters);
21: results.Text = "got a token for " + ar.UserInfo.GivenName;
22: }
23: public MyPage()
24: {
25: var getTokenButton = new Button
26: {
27: Text = "Get token"
28: };
29: getTokenButton.Clicked += getTokenButton_Clicked;
30: results = new Label();
31:
32: Content = new StackLayout
33: {
34: Children = {
35: getTokenButton,results
36: }
37: };
38: }
39: }
40: }
As described in the general pattern, the page exposes one property of type IPlatformParameter (line 9).
The lines form 12 to 22 are a simple click event handler which do the good old ADAL interactive token acquisition flow to get a token for the Graph API, then optimistically (no error handling – quick & dirty!) displays the first name of the user who just obtained the token.
The rest of the file takes care of assembling the page layout. And that’s it!
Let’s now focus on the iOS project.
All you need to do here is to add a new class and name it MyPageRenderer. Here there’s the full source:
1: using Microsoft.IdentityModel.Clients.ActiveDirectory;
2: using X.FormsADALvs2013;
3: using X.FormsADALvs2013.iOS;
4: using Xamarin.Forms;
5: using Xamarin.Forms.Platform.iOS;
6:
7: [assembly: ExportRenderer(typeof(MyPage), typeof(MyPageRenderer))]
8: namespace X.FormsADALvs2013.iOS
9: {
10: class MyPageRenderer: PageRenderer
11: {
12: MyPage page;
13:
14: protected override void OnElementChanged (VisualElementChangedEventArgs e)
15: {
16: base.OnElementChanged (e);
17: page = e.NewElement as MyPage;
18: }
19:
20: public override void ViewDidLoad ()
21: {
22: base.ViewDidLoad ();
23: page.platformParameters = new PlatformParameters(this);
24: }
25:
26: }
27: }
Super important: line 7. That’s the line that tells the runtime how to match this renderer to its page.
The code in itself is straightforward. The renderer keeps a reference to the page it is being applied to, via the property page (line 12) which is assigned via the OnElementChanged event (14 to 18).
ViewDidLoad creates for us the opportunity to assign to the page the iOS specific concrete implementation of IPlatformParameters, PlatformParameters.
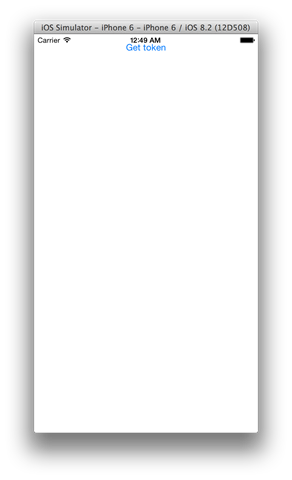
Believe it or not, that’s it! Let’s give it a spin. Make sure that you have a Mac with the Xamarin.iOS Build Host running and paired to your VS instance, that the iOS project is the startup project in the solution, and that you selected your favorite emulator flavor – then hit F5. On your companion Mac you will see the following:
Hit Get Token.
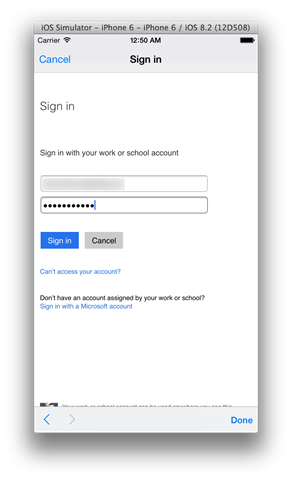
You should get prompted. Enter the credentials of any Azure AD user you want to use for this test.
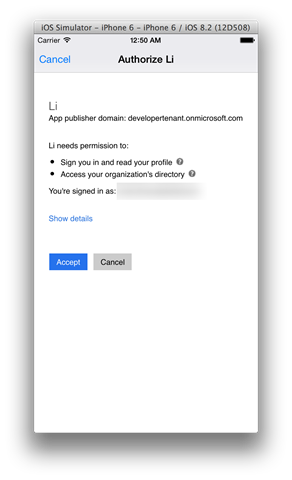
You will get prompted for consent. Grant it, and…
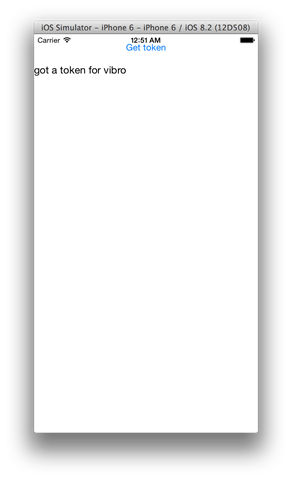
…voila’! Les très jolis token.
To do the same on Android, you just create the appropriate PageRenderer in the Android project. You can read more about PageRenderes here.
Summary
Using Xamarin.Forms with ADAL v3 is super easy! Apologies for not having posted a full sample yet: we are busy cooking veeeery interesting stuff, which we’ll unveil soon – and as soon as we’re past that, we’ll refresh the samples as appropriate. In the meanwhile, I hope the above will unblock you ![]() happy cross platform coding!!!
happy cross platform coding!!!


