Use the JWT handler to write a μ- Authorization Server in ~3 lines of code – see it in action with a Windows Store app client & Web API PR
[if there was ever a post where you NEED to understand my post disclaimers, this is it. This is my PERSONAL blog, what I write here are MY OWN personal elucubrations, largely written on nights and weekends instead of engaging in healthy activities, and is by no mean official guidance. Please refer to MSDN and to the official team blogs for those.]
[In short: I will show you how to cobble together an MVC app which behaves like an micro Authorization Server, receives tokens from ACS/Winodws Azure AD and uses the JWT handler to issue access tokens using the OAuth2 implicit profile. I will also show how to use that micro AS to authenticate users of a simple Windows Store app, and invoke a Web API (also using the JWT handler, this time for validating incoming tokens).]
Last Friday I was walking with my good friend Daniel Roth to a meeting in a nearby building .
Dan looks after Web API: as you can imagine, we’ve been discussing Web API security often in the last few months. The latest subject was custom Authorization Servers: he mentioned that some of his customers really want to be able to control in fine details what resources can be accessed, what kind of permissions are possible, and similar considerations. Basically, he wanted to build a custom AS.
My classic knee-jerk reaction was the same I have when talking about development of a custom STS: “you are better off using a packaged product or a hosted service”. An AS, like an STS, is on the critical path of pretty much everything you do; it has to be available, manageable, secure, performing… and those are features that are expensive to obtain: whomever built the packaged product/service already paid those prices, why should you re-do it, and so on. If you read this blog in the last few years, you already know that song.
However, just like for the custom STS cases, there are indeed situations where the custom route – albeit steep – is the only one that offers the level of control required.
That made me think of some examples. For a GIS service the resources could be maps of a region, information layers (such as points of interests, yearly temperature data, median income of the population), routes and similar; the permissions could be very specific, such as the ability of reading the artifacts referring to one area but not another; or to see all the maps for all regions, but no access to PII-rich data layers. That would indeed require an AS which is awfully close to the resources themselves, knows everything about the resource types and is aware of all the possible operations to authorize or prevent.
That convinced me that trying to write an AS, even if very simple, would be a worthwhile experimentation. I knew that my wife was going to work this Sunday and that I would have had time on my hands, hence I promised Dan I would put something together. Well, here we are 🙂
Here there’s the plan:
- I’ll put together a simple Windows Store app, consuming an (even simpler) Web API without any authentication.
- I’’ll write a MVC4 application, adding in a controller the MINIMAL logic for processing OAuth2 token requests and generating responses, according to the implicit profile. I’ll secure the app using the identity and access tools and ACS, which will allow us to use Facebook and Windows Azure AD users. Finally, I’ll deploy the AS to Windows Azure Web Sites.
- I’ll modify the Windows Store app client to obtain a token from the AS and use it to secure calls to the Web API service;
- I’ll also modify the Web API to validate incoming tokens
You’ll see that the code is surprisingly simple, but don’t get fooled into thinking that any of this can go ‘as is’ anywhere near to production! Just like for custom STSes, it’s easy to put together something that goes through the protocol motions; but before even considering moving it further, there is an enormous amount of critical aspects to be addressed. As usual, please read all this with a humongous grain of salt. Think Superman’s Fortress of Solitude-class.
Sample client and Web API’s Protected Resource
Alrighty, let’s get our hands dirty! 🙂 I won’t give you exact step by step instructions or the Sunday won’t be enough to write the post, but this should be detailed enough for you to follow if you are familiar with Visual Studio.
Let’s start with the service side. I want to create a simple inspirational quotes service. Here I will just support the classic IEnumerable GET of all the resources, but you can happily add editing capabilities later and implement the matching HTTP verbs afterwards.
Create a new Web Application project, choose MVC 4 Web App, and pick the Web API template. I called my project MyProtectedResource.
Add a new controller for serving the quotes. Here there’s the code of the one I wrote:
using System.Collections.Generic;
using System.Web.Http;

namespace MyProtectedResource.Controllers
{
    public class InspiringQuotesController : ApiController
    {
        //
        // GET: /InspiringQuotes/

        private static readonly List<string> Quotes = new List<string>
        {
            ""data is not information"",
            ""correlation is not causation"",
            ""Something, something, something, dark side. Something, something, something, complete"",
        };


        public IEnumerable<string> Get()
        {
            return Quotes;
        }
    }
}
As straightforward as it gets. Let’s move to the client.
Add a new project to the solution: choose the Windows Store category, and create an empty application.
Here I want to show a pretty Spartan UX: a title, a list of quotes (I’ll data-bind) and a button to retrieve them. I could retrieve them at startup time, but I want the button to show you few interesting things about how authentication in Windows Store apps works later in the post. Here there’s the XAML:
<Page
    x:Class="App1.MainPage"
    xmlns="http://schemas.microsoft.com/winfx/2006/xaml/presentation"
    xmlns:x="http://schemas.microsoft.com/winfx/2006/xaml"
    xmlns:local="using:App1"
    xmlns:d="http://schemas.microsoft.com/expression/blend/2008"
    xmlns:mc="http://schemas.openxmlformats.org/markup-compatibility/2006"
    mc:Ignorable="d">

<Grid Background="{StaticResource ApplicationPageBackgroundThemeBrush}">

<StackPanel Orientation="Vertical">
  <TextBlock Text="Inspiring Quotes"
            Margin="50,50,0,50"
            Style="{StaticResource PageHeaderTextStyle}" />
  <Button Click="Button_Click_1" Margin="50,0,0,50">get quotes...</Button>
  <ListView x:Name="quotesListView">
    <ListView.ItemTemplate>
       <DataTemplate>
         <Grid>
           <Border>
             <TextBlock Text="{Binding}"
                FontSize="18" FontFamily="Lucida Handwriting" Margin="50,50,0,50"/>
            </Border>
         </Grid>
       </DataTemplate>
     </ListView.ItemTemplate>
  </ListView>
</StackPanel>
</Grid>
</Page>
Yes, my XAML skills are pretty primitive 🙂 but this will do.
As you can see, the button is already wired up with one click event (i didn’t even bother to rename the one that VS generated for me when I double clicked on the button in the designer). Let’s take a look at its code.
1: private async void InitializeQuotes()
2: {
3: ObservableCollection<string> quotesColl = null;
4:
5: using (var http = new HttpClient())
6: {
7: HttpResponseMessage response =
await http.GetAsync(new Uri("http://localhost:47524/Api/InspiringQuotes"));
8: Stream rez = await response.Content.ReadAsStreamAsync();
9: var deser = new DataContractJsonSerializer(typeof(List<string>));
10: quotesColl =
new ObservableCollection<string>((IEnumerable<string>)deser.ReadObject(rez));
11: quotesListView.ItemsSource = quotesColl;
12: }
13: }
14:
15: private async void Button_Click_1(object sender, RoutedEventArgs e)
16: {
17: InitializeQuotes();
18: }
If you are familiar with Windows Store apps, that will be very straightforward; but in case you aren’t
- Line 3: this collection will contain the list of quotes and be used as data source. I am using that type because that will allow you, if you choose to add editing capabilities, to propagate the changes back to the service using the WinRT environment’s features. Feel free to ignore this last bit, it’s irrelevant to this tutorial
- Line 5: creates an HttpClient for hitting the service with our request
- Line 7: hits the service with our request. The IIS express address is what I got from the property pages. I should have used HTTPS, of course.
- Lines 8 to 11: parses the response into our quotes collection. Note the complete absence of error management code, due to my slacking attitude during weekends
- Line 17: the actual call
Simple, right? let’s give it a spin. Go in the solution properties, make the solution multi-start, and pick both projects. Hit F5.
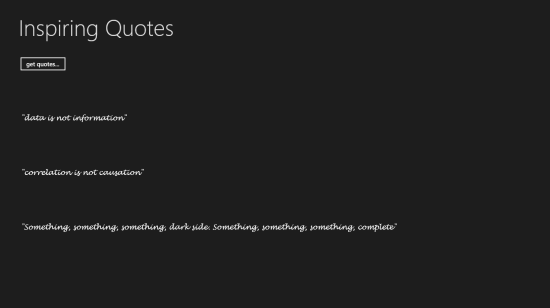
Hit “get quotes”…
…and like a fierce lighthouse piercing through the thick fog of confusion, three immortal quotes are revealed.
Great! Now, let’s say that we want to restrict access to this service to specific user populations. From all the JWT samples, we already know we can easily secure the Web API side. How to acquire a token from the Windows Store app, though? Windows provides nice API for that: but in order to use them, we need an Authorization Server.
A micro authorization server
Did you read the OAuth2 specification? I am totally serious, it is actually pretty readable! OAuth2 describes how a client can work with one entity called Authorization Server (from now on AS) to obtain delegated access to a protected resource. I won’t go in the details of how that works here; rather, I’ll discuss what I implemented and why. As usual, I’ll do some pretty dramatic simplifications; also, per what I wrote here I won’t even try to be “interoperable” (whatever that means in this context).
In a nutshell, the job of an AS is to
- establish the identity of the caller (to verify that he/she actually is the resource owner)
- accept requests formed according to what the OAuth2 specs describe
- inform the caller about the permissions being asked, from which client and for what resources; ask for consent
- if the caller granted consent, return the kind of grant asked (code, token, etc etc) according to what the OAuth2 specs describe
That’s very similar to what you’d do when implementing a passive STS: pretty much any web application will do. Good, I decided: I am going to use an MVC4 app for implementing the AS.
If you want to follow along, create a new MVC4 application in the solution: I called mine PoorMansAS. Any template will do: I picked the Intranet one simply because there’s not too much stuff out of the box to clean up.
Now, let’s go through the various tasks listed above and see how to project those in our implementation.
#1 is the step where people often gets confused. I believe this stems from the fact that this step entails securing the authorization endpoint with some kind of sign-in flow, which can (and often is) done with perfectly standard, traditional sign in methods: ASP.NET membership provider, OpenID provider, federation with ADFSv2, federation with an ACS namespace, Windows Azure AD… any method will work, as long as the AS can use its outcome to recognize the resource owner. The IdP used for sign-in can be in itself entirely oblivious about what will happen next (e.g. the actual OAuth bits).
For our AS I am going to use ACS. Concretely: I’ll use the Identity and Access Tools for VS2012 to secure the MVC app against one ACS namespace. I am going to use one I already have, which happens to be already federated with Facebook and Windows Azure AD; you can find all the instructions here.
#2 is pretty easy, especially if we pick an easy profile: here I’ll go for the implicit profile, where a request directly leads to an access token without intermediate steps. Here there’s how the spec describes a request for the implicit flow:
GET /authorize?response_type=token&client_id=s6BhdRkqt3&state=xyz
&redirect_uri=https%3A%2F%2Fclient%2Eexample%2Ecom%2Fcb HTTP/1.1
Host: server.example.com
That boils down to a controller and one action accepting the above as parameters. Hence, I’ll create a new controller as one action as below:
namespace PoorMansAS.Controllers
{
    public class AuthorizationServerController : Controller
    {
        [Authorize]
        public ActionResult Authorize(string response_type,
                                      string client_id,
                                     string state,
                                     string redirect_uri,
                                     string resource)
        {
You might have noticed I have added an extra parameter, resource. Its purpose is to let the AS know which resource we are asking access to. That will likely trigger some controversy about use of Scope for that purpose instead. I don’t want to enter in religious arguments here, if you are interested in the rationale we can chat offline; let’s just say that for the purpose of this example (which is NOT production ready, as you already know) the resource parameter makes up of an easier flow.
#3 is the step that I am going to leave in its entirety as exercise for the reader. It entails looking up the current user (which you’ll find in ClaimsPrincipal.Current, as authenticated from ACS and WIF in #1), comparing it with the resources model that is specific to your case, render some UI which prompts the user for the things you want to ask, and get back here with the results (and without having forgotten the list of parameters you originally received). That’s pure MVC UX, no OAuth magic required, hence I’ll skip it.
#4 is the interesting part. It mainly entails creating the token you want to return to the client, and embed it in the right format. Per the OAuth spec, it should look like the following:
HTTP/1.1 302 Found
Location: http://example.com/cb#access_token=2YotnFZFEjr1zCsicMWpAA
&state=xyz&token_type=example&expires_in=3600
That’s right, this is just a redirect against the redirect_uri specified in the request (which you should normally validate against what you know about the client, BTW). This means we can just generate a token, embed it in the right URL template, return it within a RedirectResult and call it a day. Sounds simple enough. Let’s get to work and write the body of Authorize.
Given that we are skipping #3, what should we put in the token? I have a proposal. How about we take the claims content of the incoming token (the one we get from #1) and just re-issue those? For the tutorial that seems good enough; if you want to apply sophisticated transformation logic without repackaging, that’s pretty simple: do whatever claims arithmetic you want on the incoming ClaimsPrincipal before using it to seed the outgoing token.
Speaking of the outgoing token: the obvious choice here is a JWT, hence make sure you add a reference to the JWT Handler NuGet. The good news is that creating a new JWT is ridiculously easy with the new JWT handler, we don’t even need to bother setting up with an STS pipeline; we can literally just new() one, with the parameters we want. So, here there’s the first line of our Authorize method:
1: JWTSecurityToken jst = new JWTSecurityToken("urn:poormansas",
2: resource,
3: ClaimsPrincipal.Current.Claims,
4: CreateSigningCredentials(),
5: DateTime.Now,
6: DateTime.Now.AddHours(1));
I broke the parameters down so that I can provide some commentary.
Line 1: this string is the Issuer identifier I picked for our micro AS.
Line 2: that’s the resource ID: basically it’s the token audience, the service we are issuing a token for
Line 3: the claims describing the current authenticated user
Line 4: the key used by the AS to sign the token. More about that below
Line 5: creation instant
Line 6: validity limits. This token will be valid for one hour, starting from now.
Now we have a token in memory. Superb! All we need to do is serialize it and return it as described by the standard. Here there are the next (and last) 2 lines of Authorize.
1: JWTSecurityTokenHandler jh = new JWTSecurityTokenHandler();
2:
3: return new RedirectResult(
4: string.Format("{0}#access_token={1}{2}&token_type=bearer&expires_in=3600",
5: redirect_uri,
6: jh.WriteToken(jst),
7: ((state == null) ? string.Empty : "&state=" + state)));
Line 1: in order to serialize the token, we need a handler instance
Line 3: to return a 302, we return a RedirectResult
Line 4: this is the URL template as shown in the snippet form the standard, with the proper placeholders
Line 5: the redirect_uri provided by the client. Did I mention you’d normally validate it somehow?
Line 6: the handler is used to emit the JWT in its encoded format, ready to travel on the wire
Line 7: if the client specified a state, we play it back.
This is pretty much all we need for our micro AS. There’s a detail missing, though: the key we use for signing tokens. My personal preference is using X509 certificates, as they dramatically simplify key distribution; however, as you’ll see in a moment, here I used a symmetric key. Why? For a very menial reason, which requires me to do a little bit of a detour.
You see, the AS is going to be accessed through the WebAuthenticationBroker (WAB from now on) API. The WAB offers a very handy API for driving OAuth-based authentication experiences: as we will see in the next section, all you need to do is specifying the AS request URL, the redirect_uri and everything else will be taken care of for you. That includes summoning a surface on the screen that the AS can use as a canvas for rendering its authentication and consent experience. That surface tends to be extremely picky about the URLs it will render: for example, URLs that would make the bar of your browser red would not even show up in the WAB. Also, working with the WAB and URLs pointing to the local machine tends to require extra work with loopback adapters and similar. That’s all for the end user’s protection, hence all good: however, given that it’s Sunday, I don’t feel like doing a lot of extra work for working around those protections (and explaining you what I had to do). Instead I’ll avoid the problem altogether, by deploying and running my AS in Windows Azure Web Sites. It takes just minutes:
- I created a new Windows Azure Web Site, poormansas.azurewebsites.net, and downloaded the associated publishing profile
- I re-ran the Identity and Access Tools for VS2012, doing the following changes:
- In the Providers tab, changed the return URL for the app to https://poormansas.azurewebsites.net/
- In the Configuration tab, I made sure that both realm and audienceURI are at “urn:poormansas”; and I checked the “Enable web farm cookies” box
- I published the PoorMansAS project directly from Visual Studio to the corresponding Windows Azure Web Site
And voila’, we now have a publicly addressable AS that will make the WAB happy.
OK – you might say – that’s all fine and dandy, but what does that have to do with the use of symmetric keys instead of certificates? The fact is, using certificates in Windows Azure Web Sites is not super-easy right now. I could have targeted a Cloud Service, which does have nice support for X509, but things would have taken longer; so I just factored out from Authorize the actual signing credentials creation so that you can easily substitute its code for a certificate if you so choose. Now that you finally know why I am using a symmetric key, here there’s the code of CreateSigningCredentials:
private SigningCredentials CreateSigningCredentials()
{
   string symmetricKey = "V..................................E=";
   byte[] keybytes = Convert.FromBase64String(symmetricKey);
   SecurityKey securityKey = new InMemorySymmetricSecurityKey(keybytes);
   SigningCredentials signingCredentials =
           new SigningCredentials(securityKey,
               SecurityAlgorithms.HmacSha256Signature,
               SecurityAlgorithms.Sha256Digest);
   return signingCredentials;
}
Not much to comment here, it’s some crypto soup which gets distilled in a signing credential (thank you Brent for knowing *everything* about this stuff, you’re a national treasure :-)). Ah, and of course that code has to be in the package you deploy to your Web Site.
Alrighty! So many words, but so little code required – in what I believe is a testament of how neat & handy MVC, WIF, the JWT handler and OAuth in general are.
I trust you fully understand that this implementation is obscenely lacking in term of basic security, error management, and all that is good and required for software to even dream of getting closer to something with any actual use; this is just for giving you an idea of the entire scenario, kind of when we add custom STSes in our samples and labs for showing things end to end. Sorry if those frequent disclaimers are annoying, but I just want to make sure we’re clear 🙂
Securing the Web API with the JWT Handler
Very well. Now that we have an AS, we can add a DelegatingHandler to the Web API representing the resource (MyProtectedResource) in the same was as explained in the backed section here. The only difference is in fact in the use of the symmetric key for validating the incoming token. In concrete, you’ll have to modify the creation of the TokenValidationParameters as follows:
TokenValidationParameters validationParameters =
new TokenValidationParameters()
{
   AllowedAudience = "urn:poormansactassample",
   ValidIssuer = "urn:poormansas",
   SigningToken = new BinarySecretSecurityToken(
       Convert.FromBase64String("V...............E="))
};
Everything else is as described in here.
Now that the API is ready to validate incoming tokens, it’s time to get us some.
Getting tokens with the WebAuthenticationBroker
Let’s get back to the client. In order to complete our scenario, we need to perform 2 tasks:
- we need to modify the call to the service to include a token
- we need to add logic to acquire the token through our new AS
The first one is easy, so let’s get it out of the way:
1: private async void InitializeQuotes(string token)
2: {
3: ObservableCollection<string> quotesColl = null;
4:
5: using (var http = new HttpClient())
6: {
7: http.DefaultRequestHeaders.Authorization =
new System.Net.Http.Headers.AuthenticationHeaderValue(
"bearer", token);
8: HttpResponseMessage response = await http.GetAsync(new Uri("http://localhost:47524/Api/InspiringQuotes"));
9: Stream rez = await response.Content.ReadAsStreamAsync();
10: var deser = new DataContractJsonSerializer(typeof(List<string>));
11: quotesColl = new ObservableCollection<string>((IEnumerable<string>)deser.ReadObject(rez));
12: quotesListView.ItemsSource = quotesColl;
13: }
14: }
I didn’t reformat much, because there’s only 2 lines that changed: #1, in which we added a parameter token, and #7, where we add the token as authentication header. Everything else remains the same.
And now, for a bit more fun, let’s see how to change the click handler of the button to include a request for a token to the AS:
1: private async void Button_Click_1(object sender, RoutedEventArgs e)
2: {
3: string StartUri =
4: "https://poormansas.azurewebsites.net/AuthorizationServer/Authorize?
response_type=token&
state=xyz&
resource=urn:poormansactassample&
client_id=s6BhdRkqt3&
redirect_uri="
5: + Uri.EscapeUriString("http://myreturnuri");
6: WebAuthenticationResult WebAuthenticationResult =
await WebAuthenticationBroker.AuthenticateAsync(
WebAuthenticationOptions.None,
new System.Uri(StartUri),
new System.Uri("http://myreturnuri") );
7:
8: if (WebAuthenticationResult.ResponseStatus ==
WebAuthenticationStatus.Success)
9: {
10: string a = WebAuthenticationResult.ResponseData.ToString();
11: string token =
a.Substring(a.IndexOf('=') + 1,
a.IndexOf('&') - a.IndexOf('=') - 1);
12:
13: InitializeQuotes(token);
14: }
15: else if (WebAuthenticationResult.ResponseStatus == WebAuthenticationStatus.ErrorHttp)
16: {
17: string ee = WebAuthenticationResult.ResponseErrorDetail.ToString();
18: }
19: else
20: {
21: string rs = WebAuthenticationResult.ResponseStatus.ToString();
22: }
23: }
Lots of long lines, which I had to break in nonstandard ways to adapt to the blog narrow theme… hopefully the colored syntax will help. Let’s dive:
Line 3: this string contains the request for the AS. I broke that down for legibility. The first part is, obviously, the path to the action. The response_type=token indicates that we want to do the implicit profile. The state is there just to show that, well, it works :-). The resource is the “realm”/intended audience/ID of the service we are asking a token for. The client ID is a random string I am using a placeholder, but IRL you’d use the ID that the client used to register itself with the AS (and the AS would validate it). The redirect_uri is an arbitrary URI that will be used by the AS to 302’s the result. It does not have to correspond to a network addressable endpoint, and in fact in this case it does not.
Line 4: this is the key line. Here we invoke the WAB, via the AuthenticateAsync method, passing: default authentication settings (please ignore this for this post, I might touch on that in the future), the AS request URL as the initial URL to render in the WAB, and the redirect_uri value. The last value tells the WAB that as soon as the flow would end up accessing such URI, it’s time to interrupt the interaction and return the last URL in its entirety.
Line 8: if the authentication flow terminated successfully:
Line 10: we extract from the AuthenticationResults the ResponseData, which are in fact the latest request’ URL
Line 11: we parse out from it the token bits, in a very un-scientific fashion (see earlier for the format in which tokens are returned in the implicit profile).
Line 13: we make our call, passing the token, with the modified InitializeQuotes shown earlier.
Line 15 to 22: just some interesting places for you to keep an eye on when something does not go as expected.
Perfect, we are ready to see this thing in action! Place a breakpoint on line 13, and hit F5.
You’ll see the same app screen as before. Hit Get quotes.
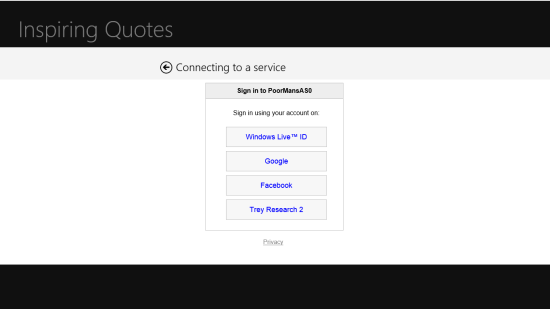
A-ha! DO you recognize that screen? yes, it’s the ACS HRD page. Hit Facebook.
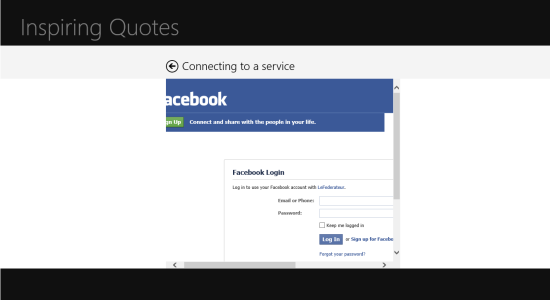
It was to be expected. ACS has no idea that you are browsing thru the WAB, which uses a fixed with, hence it does not invoke Facebook with the smaller auth page layout. But hey, this is an experiment, no expectations of perfection here. Go ahead and authenticate; if everything goes well, VS should stop at the breakpoint.
Hover over the variable a: it’s interesting to see what we get back. In my case, I get
http://myreturnuri/#access_token=eyJ0eXAiOiJKV1QiLCJhbGciOiJIUzI1NiJ9.ey
[OMISSIS]ck&state=xyz&token_type=bearer&expires_in=3600
..which is really not that surprising, but I would say reassuring 🙂
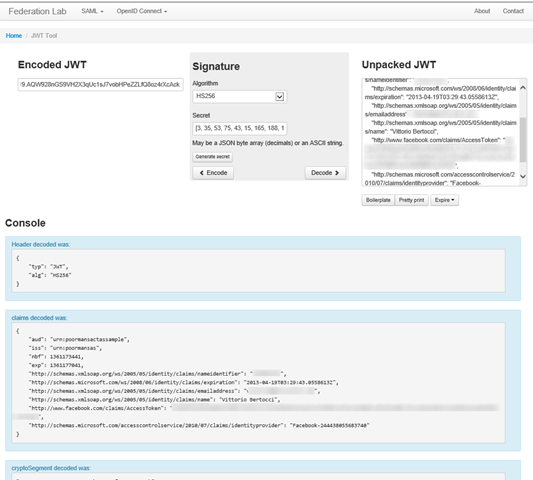
Now, I’ll show you a pretty neat trick. Hover over the token variable, and copy its value from the debugger “tooltip”. Now: open a browser and navigate to http://openidtest.uninett.no/jwt.
Here, paste the bits in the left side under Encoded JWT. Remember to get rid of the quotes! Hit “decode”, and admire the results… the page unpacks the JWT for you and nicely visualizes its content, as shown below:
You should recognize the values for the issuer, the audience, and the usual claims you get from Facebook via ACS.
Thank you Andreas and Roland for this cool tool!
Now that we took a peek, we can hit F5 to see the rest of the call; if everything goes well, you’ll get the same screen you got in in the non-secured version.
For added points, before letting the call go you could open the Locals window and edit the value of the token variable (you might delete 1 character, for example). That should be enough to make the call fail, proving that yes, without valid token no more inspiring quotes for you 🙂
Variants & Considerations
In theory, the above concludes the scenario I committed to write for Dan; however there are a couple of interesting things that, now that you have the context fresh in your mind, would be criminal of me not to mention.
WAB’s SSO mode
Try the following experiment. Run the application as described above, but when it’s time to authenticate with Facebook, please check the “Keep me logged in” checkbox. Authenticate as usual, and observe the quotes appearing on your screen. Now hit the Get quotes button again: the experience will be exactly the same, just like if you would not have checked the “Keep me logged in” checkbox. What’s going on?
The WAB takes your privacy very seriously, and will try to protect you from generic web sites trying to use your existing sessions without you knowing. How does it do that? Simple. In the default case, the one we implemented so far, every time you invoke the WAB you are getting a brand-new session. That session has no access to any cookies you might have saved in former sessions, and has no access to the cookies on your machine (e.g. the ones you use with IE). That way, the pages you are showing now cannot use existing cookies to access web sites on your behalf without you knowing.
That said: there are indeed situations in which you would like to be able to save cookies and access them later. There is a way for you to invoke the WAB while retaining access to cookies saved in past sessions: in WAB jargon it is called “SSO mode”, and it its described in details here.
In a nutshell: you access SSO mode by invoking AuthenticateAsync without specifying the redirect_uri. That tells the WAB to open its “browser” against an existing SSO container. The idea is that, instead of allowing for an arbitrary redirect_uri, the AS is supposed to redirect to a special address, which is in fact the ID of the Windows Store application as assigned by the Windows Dev Center. Do read the msdn page I linked earlier: however here there’s what you need to do in practice.
- Find out the application ID. Given that the app is not registered in the Dev Cetner, what can we use? There is an API you can use to find out the right value: it’s basically Uri EndUri = WebAuthenticationBroker.GetCurrentApplicationCallbackUri();
- Modify the StarUri cosntruction so that the redirect_uri parameter gets the value calculated in #1. Note, IRL you might want to pre-register that URL with the AS and make it correspond to the client ID, in which case you would not need to explicitly pass it
- Modify the call to AuthenticateAsync by eliminating the last parameter
If you do the above and run through the same sequence described earlier in this section, you’ll see that this time the “keep me logged in” flag does work. There’s more! Close the app and restart it: you’ll discover that the cookie is still there, the SSO container is independent from the application 🙂 that is a blessing, but it is also a curse: if you save the wrong cookie, then it’s going to be hard to clear it up ad the only way of getting to the SSO cookies jar is to open the WAB in SSO mode.
Windows Azure AD preview experience opt-in
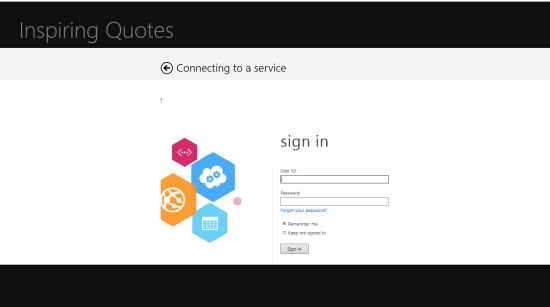
The ACS namespace I used here is federated with a Windows Azure Active Directory tenant. Try to run the app and choose Trey Research 2, you’ll get to the following:
That is also the “full desktop” authentication layout. However, in this case there is something you can do about it!
You might have read that we just released in preview a new responsive design for our sign-in experiences. The good news is that the way in which you opt in for using the new experience is… navigating to a page which will record your choice in a cookie 🙂 doesn’t that sound like a perfect dovetail to what we just learned about the SSO mode?
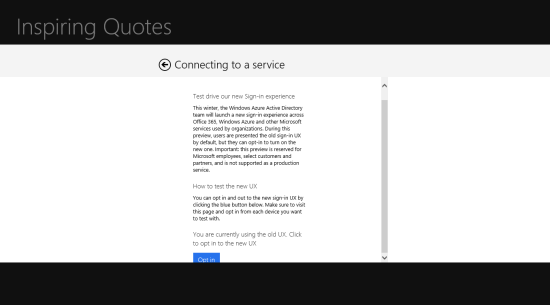
Assuming you did the steps for getting into SSO mode. Temporarily modify your app to use , then launch and click the Get quotes button. You will see the following:
Click opt-in, go back to the app, stop, change the startUri back to the SSO mode value, and hit F5 again.
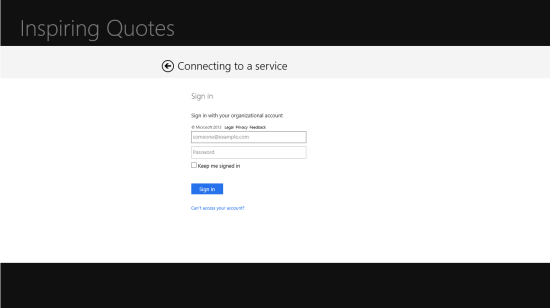
Click to get quotes, choose Trey Research 2, and… there’s the beautifully scaled responsive design experience for you 🙂
Summary
Well, Dan, I hope you’re satisfied 🙂 It took until midnight, but I did manage to do and document all the various moving parts we discussed.
Let’s review what I did here:
- i started from a simple Windows Store client app, consuming a basic Web API
- I created an MVC4 app, secured it with ACS, and added a controller which accepts requests which look (almost) like the ones described by the implicit profile in the OAuth2 specs and spits out JWTs, also as described in the implicit profile
- I modified the Web API to expect JWTs issued from the MVC 4 app
- I modified the client app to obtain tokens from the MVC 4 app via WebAuthenticationBroker, and inject those tokens in calls to the Web API
- I explored a couple of variants, specifically around WebAuthenticationBroker and Windows Azure AD (unrelated) features
I called the MVC4 app described above a micro Authorization Server. Is it fair? Perhaps not, given that the skeleton implementation presented lacks many key features; and of course, all the warnings about custom STSes are even stronger here. Packaged products, and even better services, will almost always be a better choice than rolling your own. That said, I hope you found this little experiment fun and thought-provoking 🙂


