Fun with Blink(1) and Claims: Unboxing and Identity Providers’ Synesthesia
[WARNING: this post has no business value whatsoever, and that is by design. Please do not take any of this post as something you’d do in your applications. I got a new toy and I am just goofing around with it :-)]
If you’ve been reading this blog through the years, you know I am a big fan of gadgets and in general anything I can tinker with.
Last August I read about Blink(1), a very promising project on Kickstarter for an über USB status light, which would allow you to translate any event you want to keep an eye on in blinks of arbitrary color/intensity/frequency. I instantly wanted in! I proudly joined the ranks of the project backers, and hoped that it would actually become reality.
Today, almost 4 months later, I found in the mailbox a nice padded mailer containing a cute box with the blinker: beautifully made, and a perfect match with the original vision. Isn’t the epoch we live in absolutely amazing? 🙂
Anyway, the enthusiasm for the little toy was soon tempered by the somewhat shaky support for using Blink(1) from .NET. That wasn’t enough to deter me from messing with it anyway and from finding a way of concocting something claims-related.
And now that you know the overall story, without further ado…
Unboxing Blink(1)
Here, savor with me the pleasure of unboxing a new gadget. After the various updates from the project creators, I knew I was going to get Blink(1) this week.
When I dug out this white bubble-wrap envelope from the daily pile of magazines (the magic of magformiles and having held a travelling job for few years) I *knew* that it was it 🙂
In a very Japanese turn of events the envelope contained another mailer, also bubble-lined. Those guys really made sure that the goods arrived in good shape.
And finally, the product box! It’s really tiny: the drawing on the top is a 1:1 representation. Notable detail, the lid snaps to the box body via a magnet. Very classy 🙂
Before opening it, let’s take a look on the bottom side: there you’ll find enough info to grok what the product is about and to get you started using it.
…and finally, ta-dah! Here’s Blink(1), hugged by its foam bed. It’s exactly as advertised: a small translucent enclosure of white plastic with a gently chamfered aluminum top, all fitting together in perfect alignment.
Here there’s another view, to get you a feeling of the dongle size before plugging it in.
…and in it goes. The Blink(1) gets recognized immediately by Windows: it flashes once, then it goes quiet waiting for your commands. More about that in the next section.
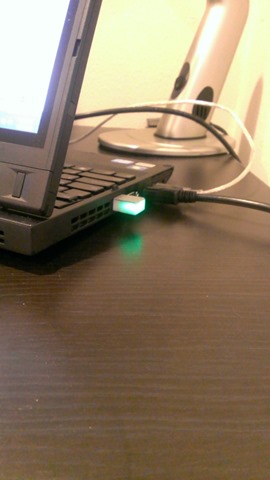
Above you can see a shot of Blink(1) plugged in my Lenovo X230 Tablet, shining a nice shade of green. How did I get it to do that? Read on…
Goofing Around with Blink(1) and Claims
The main appeal Blink(1) has for me is its potential to manifest in meatspace events that would normally require you to watch a screen and interpret it. It might not have the directness of acquiring a brand-new new sense, but it can certainly contribute to confer an intuitive dimension to events that one would normally only understand by cognition.
That sounds all nice and dandy, but how to make all of that concrete? I wanted to get my hands dirty with some code, and obviously doing something identity-related came to mind. I thought about which aspects of claims-based identity could be made intuitive by a multi-colored blinking light. I won’t bore you with a long digression about the process that led me to choose what I picked, and will go straight to my conclusions: I decided to give a color to the identity providers.
Say that you have a Web application, and that you outsourced authentication to the Windows Azure Access Control Service. Let’s also say that you accept identities from the following sources:
- One or more Windows Azure Active Directory tenants
- Yahoo!
- Microsoft Accounts (formerly Windows Live ID)
If you keep a log you can determine how often your users come from one provider or another, however wouldn’t it be nice to also get an intuitive idea of the mix of users signing in at any given moment? What if, for example, every time you’d walk by your PC you could see a light indicator shining of a different color every time a user from a given identity provider signs in?
That would not be very useful to draw conclusions and projections, you need the quantitative data in your logs for that, but for an anxious control freak like me it would be nice to keep an eye on the pulse of the application.
With that idea in mind, I headed to the Git repository for Blink(1) to find out how to drive my unit as described. During the various updates about the project it looked like .NET was going to be one of the platform better supported, but something must have shifted during development. The Windows application, which I believe is required for processing the Blink(1) JSON API, does not even build in my system, apparently due to a dependency to a library that does not work on x64 systems (I think I am x64-only since 2007, and so are most of the devs I know). All of the pre-built applications failed to run, complaining that they could not find javaw. I installed JRE; they still complained about the same. I added a JAVA_HOME environment variable with the path: sometime it helps, but still nothing. Finally, I added it to the PATH system variable: the apps stopped complaining about javaw, however they still didn’t work at all. The even log showed nothing. Luckily, there was an exception to all this: the Blink(1) command line tool, which worked great from the very beginning.
The command line tool finally allowed me to get some satisfaction from my Blink(1). I experimented with different colors and update times, and I was not disappointed. Also, despite the exposure to rapid flashing I didn’t experience any enhancement in my alpha abilities, which I suspect means I have none… 😉 If anything, it left me with an even greater thirst for playing with the thing. Undeterred, I decided that if the command line was the only thing that worked, then I would have wrapped it and used it as API. After all, it’s not like if I had to do anything that would even go in production.
First thing, I fired VS2012 and created an MVC4 application. Then I added a brute-force wrap of the command line tool, exposing only a function which changes the color of Blink(1). I didn’t even bother to copy the exe from its original download location 🙂
public class BlinkCmdWrapper
{
    public static void Fade(Color color)
    {
        Process serverSideProcess = new Process();
        serverSideProcess.StartInfo.FileName =
          @"C:UsersvittorioDownloadsblink1-tool-winblink1-tool.exe";
        serverSideProcess.StartInfo.Arguments =
          "--rgb " + color.R.ToString() + ","
                       + color.G.ToString() + ","
                       + color.B.ToString();
        serverSideProcess.StartInfo.WindowStyle =
          ProcessWindowStyle.Hidden;
        serverSideProcess.Start();
    }
}
Not much to explain there, really. The “rgb” command fades the current color into the specified RGB triplet; the method calls the tool with the necessary parameters in a hidden window. Horribly inefficient, yes; but for seeing some lights blink on my laptop within the next 5 mins, it will do.
Then I configured the MVC app to use WIF to outsource authentication to ACS. Thanks to the fact that I already had a dev namespace configured with all the identity providers I needed, and the VS2012 Identity and Access tool, that took about 5 seconds :-).
All that was left was to add the logic that switches color according to the original identity provider of incoming tokens. WIF offers a nice collection of events which fire at various stages of the authentication pipeline: a good candidate for this functionality would be the SignedIn event.
Discovering the identity of the original IP is pretty trivial for tokens issued by ACS, given that the STS graciously adds a claim (http://schemas.microsoft.com/accesscontrolservice/2010/07/claims/identityprovider) meant to convey exactly that information. In the end, the thing that resulted most difficult was to choose a color for every provider 🙂 In short, I added the following to the global.asax:
void WSFederationAuthenticationModule_SignedIn(object sender, EventArgs e)
{
    // retrieve the identity provider claim
    Claim idpClaim = ClaimsPrincipal.Current.FindFirst("http://schemas.microsoft.com/accesscontrolservice/2010/07/claims/identityprovider");
    // no IP claim, but signin succeeded; it might be a custom provider
    if (idpClaim == null)
    {
        BlinkCmdWrapper.Fade(Color.White);
    } else
        switch (idpClaim.Value)
        {
            case "uri:WindowsLiveID": BlinkCmdWrapper.Fade(Color.Pink); break;
            case "Yahoo!": BlinkCmdWrapper.Fade(Color.Green); break;
            case "Google": BlinkCmdWrapper.Fade(Color.Yellow);  break;
            default: if(idpClaim.Value.StartsWith("Facebook"))
                BlinkCmdWrapper.Fade(Color.Blue);
                else if(idpClaim.Value.StartsWith("https://sts.windows.net/"))
                BlinkCmdWrapper.Fade(Color.Azure);
                    else
                    BlinkCmdWrapper.Fade(Color.Red);
                    break;
        }
}
Once again, very straightforward. The method looks up the IP claim. If it isn’t there, the provider might not have a rule to add it, or the application might be trusting another STS instead of ACS; either ways the SignedIn succeeded, hence we need to signal something: I picked white as the most neutral behavior.
If there is an IP claim: in the case of tokens from Microsoft Accounts, Yahoo! or Google the expected value is fixed (hence the switch statement). In the case of Facebook or Windows Azure Active Directory what is known is how the string begins, hence the cascading ifs in the default clause.
Well, that’s pretty much all that is required to achieve the effect we want. Let’s hit F5 and see what happens.
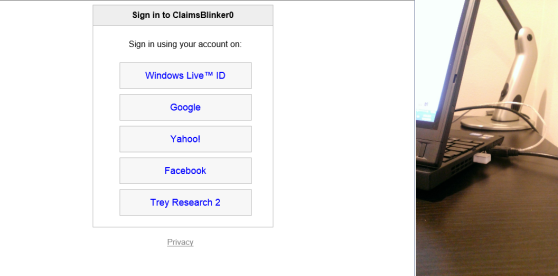
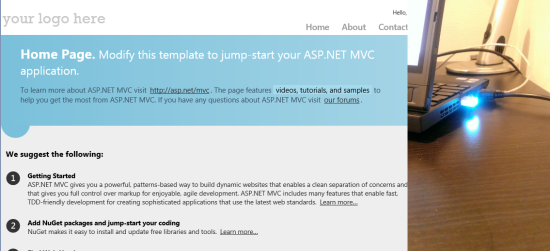
On the left side you can see an app screenshot, on the right the status of the Blink(1). At first launch you get the classic HRD page from ACS. The Blink(1) is still off, no sing in took place yet. Let’s hit Try Research 2, a Windows Azure Active Directory tenant, and authenticate.
…aand – it’s a kind of magic – the Blink(1) comes alive and shows an appropriate azure glow!
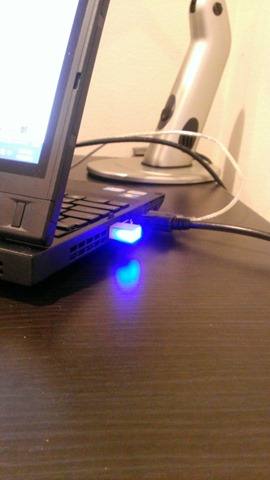
Want to see that changing? Sure. Copy the address of the app (localhost+port) and open an in-private instance of IE (or an instance of Firefox). Paste the address in, and this time sign in with Facebook:
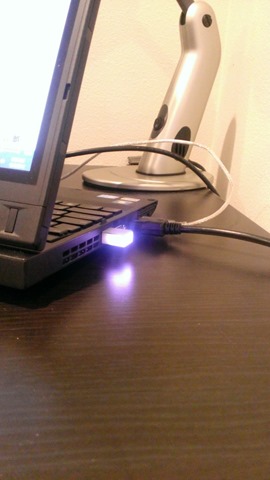
Yes, the picture does not show a striking difference, but I can assure you that the indicator is now of a much deeper blue. Want to see more difference? Close the extra browser, re-open it and repeat the above but choosing Windows Account:
Nice and pink! Repeat the above for Yahoo:
and it’s green! You get the idea.
The above is a good proof of concept of the original idea. Is it a good solution, though? Well, no. Apart from the ugly workaround of spawning a process for wrapping the command line tool, there are multiple shortcomings to deal with:
- The default fade values are too long, rapid events would not be displayed without some adjustments (pretty easy)
- Subsequent, adjacent sign-ins of users from the same provider would not be displayed. Blink(1) should probably blink rather than fade
- The token validation would take place in the cloud or in some remote HW. The events would have to be transported down to the machine where the Blink(1) is plugged, possibly via some kind of queue. ServiceBus seems a good solution here
But you know what? My goal here was to play with my new Blink(1), and that I did 🙂 Yes, it’s 3:17am and I am a happy tinkerer: I can call it a night.
Thanks to the ThingM guys for having created a really nice item. The Kickstarter process is obviously over at this point, but ThingM now offers Blink(1) in their regular store, at exactly the same price. Looking forward to more hacking when the .NET support will catch up!
.


