ACS Extensions for Umbraco – Part I: Setup
More unfolding of the tangle of new content announced with the ACS launch.
Today I want to highlight the work we’ve been doing for augmenting Umbraco with authentication and authorization capabilities straight out of ACS. We really made an effort to make those new capabilities blend into the Umbraco UI, and without false modesty I think we didn’t get far from the mark ![]()
I would also like to take this chance to thank Southworks, our long-time partner on this kind of activities, for their great work on the ACS Exensions for Umbraco.
Once again, I’ll apply the technique I used yesterday for the ACS+WP7+OAuth2+OData lab post; I will paste here the documentation as is. I am going to break this in 3 parts, following the structure we used in the documentation as well.
Access Control Service (ACS) Extensions for Umbraco
‘Click here for a video walkthrough of this tutorial’
Setting up the ACS Extensions in Umbraco is very simple. You can use the Add Library Package Reference from Visual Studio to install the ACS Extensions NuGet package to your existing Umbraco 4.7.0 instance. Once you have done that, you just need to go to the Umbraco installation pages, where you will find a new setup step: there you will fill in few data describing the ACS namespace you want to use, and presto! You’ll be ready to take advantage of your new authentication capabilities.
Alternatively, if you don’t want the NuGet Package to update Umbraco’s source code for you, you can perform the required changes manually by following the steps included in the manual installation document found in the ACS Extensions package. Once you finished all the install steps, you can go to the Umbraco install pages and configure the extension as described above. You should consider the manual installation procedure only in the case in which you really need fine control on the details of how the integration takes place, as the procedure is significantly less straightforward than the NuGet route.
In this section we will walk you through the setup process. For your convenience we are adding one initial section on installing Umbraco itself. If you already have one instance, or if you want to follow a different installation route than the one we describe here, feel free to skip to the first section below and go straight to the Umbraco.ACSExtensions NuGet install section.
Install Umbraco using the Web Platform Installer and Configure It
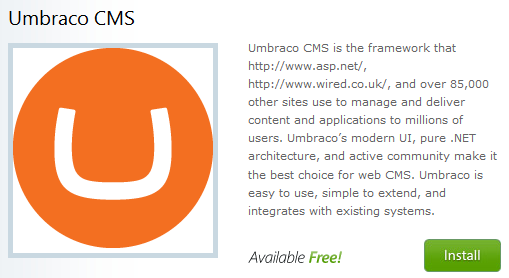
- Launch the Microsoft Web Platform Installer from http://www.microsoft.com/web/gallery/umbraco.aspx
Figure 1 – Windows Web App Gallery | Umbraco CMS
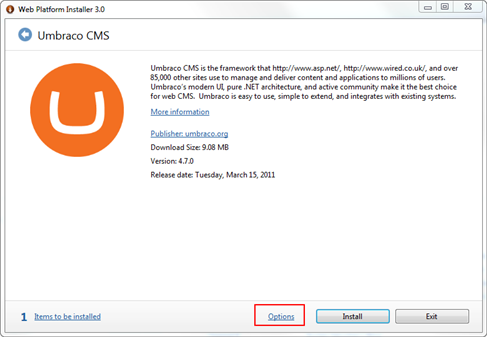
- Click on Install button. You will get to a screen like the one below:
Figure 2 – Installing Umbraco via WebPI
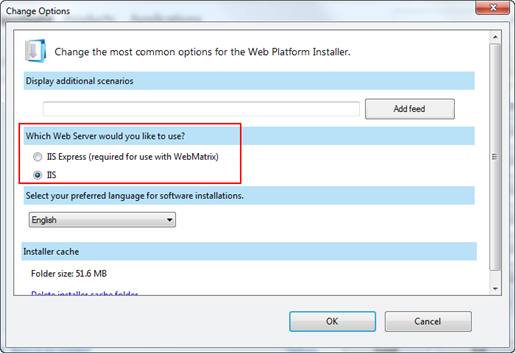
- Choose Options. From there you’ll have to select IIS as the web server (the ACS Extensions won’t work on IIS7.5).
Figure 3 – Web Platform Installer | Umbraco CMS setup options
- Click on OK, and back on the Umbraco CMS dialog click on Install.
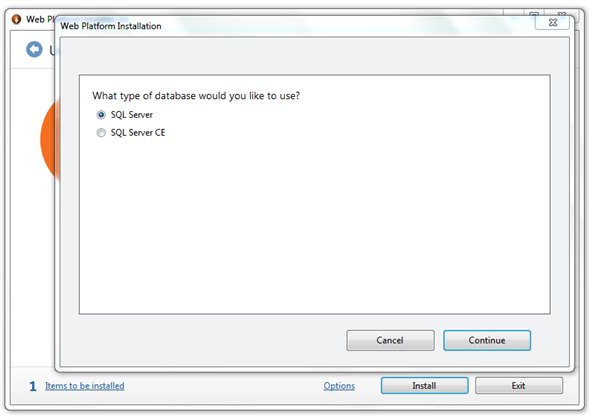
- Select SQL Server as database type. Please note that later in the setup you will need to provide the credentials for a SQL administrator user, hence your SQL Server needs to be configured to support mixed authentication.
Figure 4 – Choose database type
- Accept the license terms to start downloading and installing Umbraco.
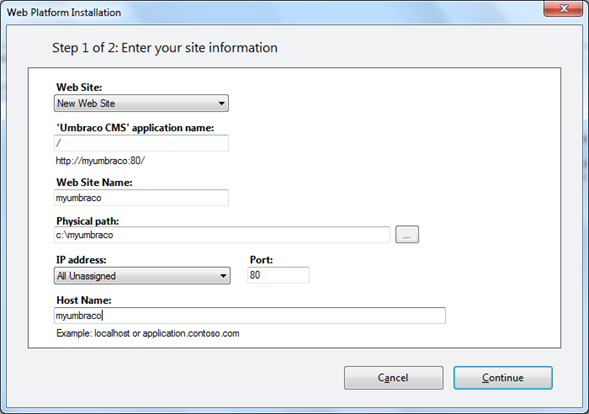
- Configure the web server settings with the following values and click on Continue.
Figure 5 – Site Information
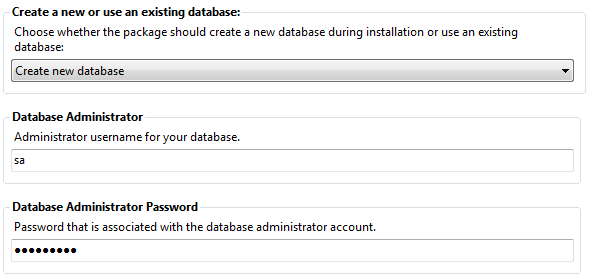
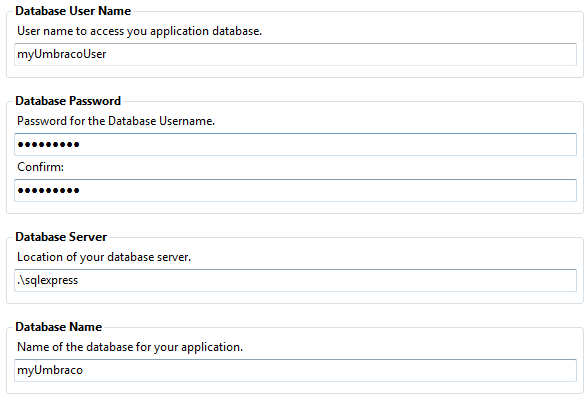
- Complete the database settings as shown below.
Figure 6 – Database settings
- When the installation finishes, click on Finish button and close the Web Platform Installer.
- Open Internet Information Services Manager and select the web site created in step 7.
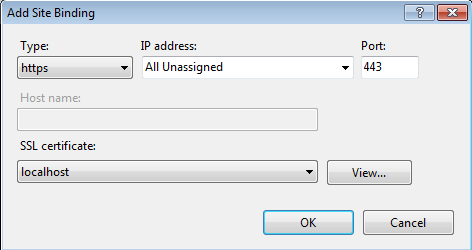
- In order to properly support the authentication operations that the ACS Extensions will enable, your web site needs to be capable of protecting communications. On the Actions pane on the right, click Bindings… and add one https binding as shown below.
Figure 7 – Add Site Binding
- Open the hosts file located in C:WindowsSystem32driversetc, and add a new entry pointing to the Umbraco instance you’ve created so that you will be able to use the web site name on the local machine.
Figure 8 – Hosts file entry
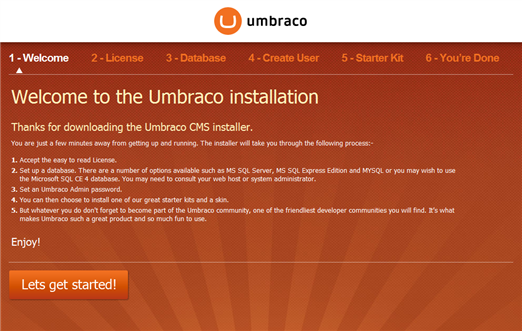
- At this point you have all the bits you need to run your Umbraco instance. All that’s left to do is make some initial configuration: Umbraco provides you with one setup portal which enables you to do just that directly from a browser. Browse to http://{yourUmbracoSite}/install/; you will get to a screen like the one below.
Figure 9 – The Umbraco installation wizard
- Please refer to the Umbraco documentation for a detailed explanation of all the options: here we will do the bare minimum to get the instance running. Click on “Let’s get started!” button to start the wizard.
- Accept the Umbraco license.
- Hit Install in the Database configuration step and click on Continue once done.
- Set a name and password for the administrator user in the Create User step.
- Pick a Starter Kit and a Skin (in this tutorial we use Simple and Sweet@s).
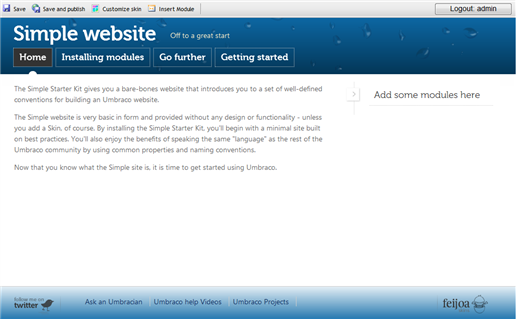
- Click on Preview your new website: your Umbraco instance is ready.
Figure 10 – Your new Umbraco instance is ready!
Install the Umbraco.ACSExtensions via NuGet Package
Installing the ACS Extensions via NuGet package is very easy.
- Open the Umbraco website from Visual Studio 2010 (File -> Open -> Web Site…)
- Open the web.config file and set the umbracoUseSSL setting with true.
Figure 11 – umbracoUseSSL setting
- Click on Save All to save the solution file.
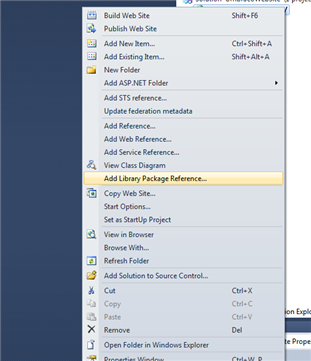
- Right-click on the website project and select “Add Library Package Reference…” as shown below. If you don’t see the entry in the menu, please make sure that NuGet 1.2 is correctly installed on your system.
Figure 12 –
umbracoUseSSL setting
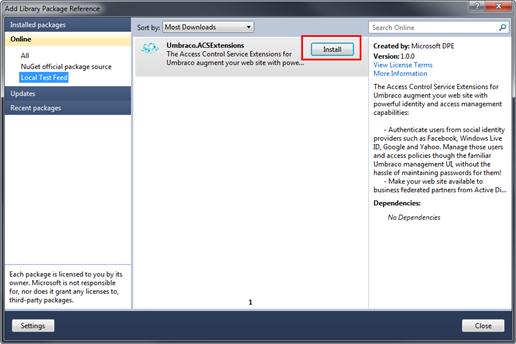
- Select the Umbraco.ACSExtensions package form the appropriate feed and click install.
At the time in which you will read this tutorial, the ACS Extensions NuGet will be available on the NuGet official package source: please select Umbraco.ACSExtensions from there. At the time of writing the ACS Extensions are not published on the official feed yet, hence in the figure here we are selecting it from a local repository. (If you want to host your own feed, see Create and use a NuGet local repository)
Figure 13 – Installing theUmbraco. ACSExtensions NuGet package
If the installation takes place correctly, a green checkmark will appear in place of the install button in the Add Library Package Reference dialog. You can close Visual Studio, from now on you’ll do everything directly from the Umbraco management UI.
Configure the ACS Extensions
Now that the extension is installed, the new identity and access features are available directly in the Umbraco management console. You didn’t configure the extensions yet: the administrative UI will sense that and direct you accordingly.
- Navigate to the management console of your Umbraco instance, at http://{yourUmbracoSite}/umbraco/. If you used an untrusted certificate when setting up the SSL binding of the web site, the browser will display a warning: dismiss it and continue to the web site.
- The management console will prompt you for a username and a password, use the credentials you defined in the Umbraco setup steps.
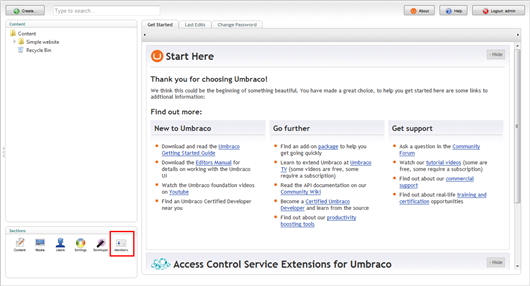
- Navigate to the Members section as shown below.
Figure 14 – The admin console home page
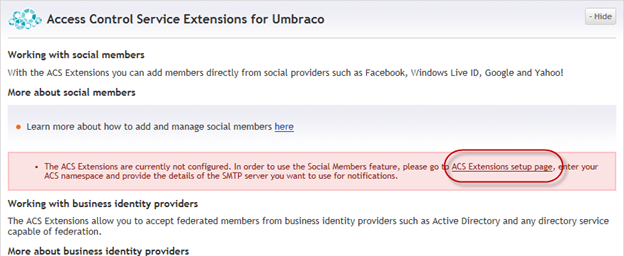
- The ACS Extensions added some new panels here. In the Access Control Service Extensions for Umbraco panel you’ll notice a warning indicating that the ACS Extensions for Umbraco are not configured yet. Click on the ACS Extensions setup page link in the warning box to navigate to the setup pages.
Figure 15 – The initial ACS Extensions configuration warning.
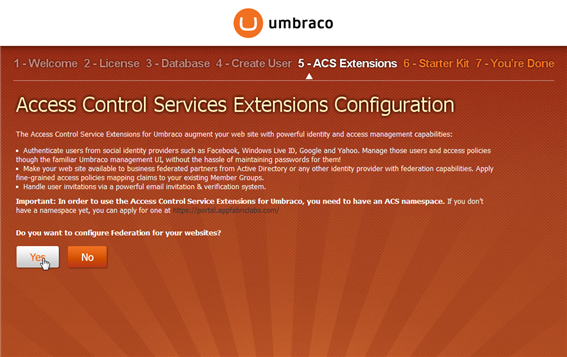
Figure 16 – The ACS Extensions setup step.
The ACS Extensions setup page extends the existing setup sequence, and lives at the address https://{yourUmbracoSite}/install/?installStep=ACSExtensions. It can be sued both for the initial setup, as shown here, and for managing subsequent changes (for example when you deploy the Umbraco site form your development environment to its production hosting, in which case the URL of the web site changes). Click Yes to begin the setup.
Access Control Service Settings
Enter your ACS namespace and the URL at which your Umbraco instance is deployed. Those two fields are mandatory, as the ACS Extensions cannot setup ACS and your instance without those.
The management key field is optional, but if you don’t enter most of the extensions features will not be available.
Figure 17 – Access Control Service Setttings
The management key can be obtained through the ACS Management Portal. The setup UI provides you a link to the right page in the ACS portal, hut you’ll need to substitute the string {namespace} with the actual namespace you want to use 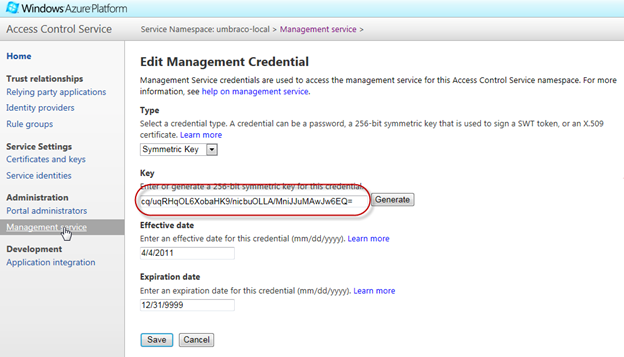
Social Identity Providers
Decide from which social identity providers you want to accept users from. This feature requires you to have entered your ACS namespace management key: if you didn’t, the ACS Extensions will use whatever identity providers are already set up in the ACS namespace.
Note that in order to integrate with Facebook you’ll need to have a Facebook application properly configured to work with your ACS namespace. The ACS Extensions gather from you the Application Id and Application Secret that are necessary for configuring ACS to use the corresponding Facebook application.
Figure 18 – Social Identity Providers
SMTP Settings
Users from social identity providers are invited to gain access to your web site via email. In order to use the social provider integration feature you need to configure a SMTP server.
Figure 19 – SMTP Settings
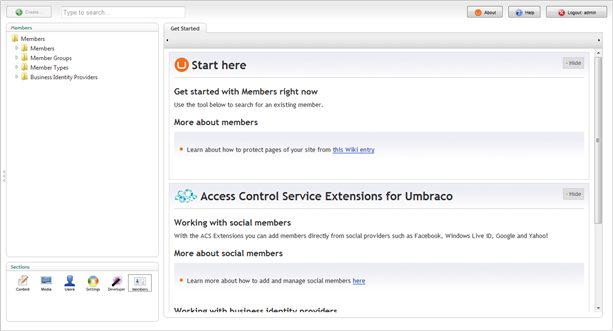
If everything goes as expected, you will see a confirmation message like the one above. If you navigate back to the admin console and to the member section, you will notice that the warning is gone. You are now ready to take advantage of the ACS Extensions.
Figure 21 – The Member section after the successful configuration of the ACS Extensions

